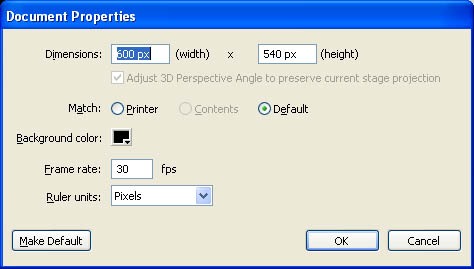
Step 1: open a new flash file. Set the width to 600 pixels and the height to 540 pixels. For this pictorial we need 8 images. We have to resize them with 330*330 for the main image and 75*75 thumbnail images. Name the images image-0 to image-7 and thumb-0 to thumb-7 and then import them into the library (File-> import->import to library).
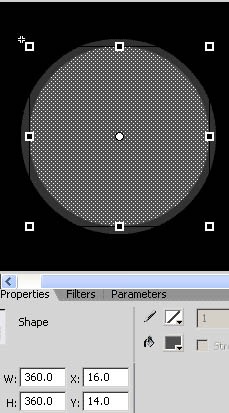
Step 2: By using oval tool (O) to creating a dark grey circle (#323232) circle, without an outline by using dimensions and positions below. I have reduced the magnification in Flash to 50%, so that it’s easier to see.
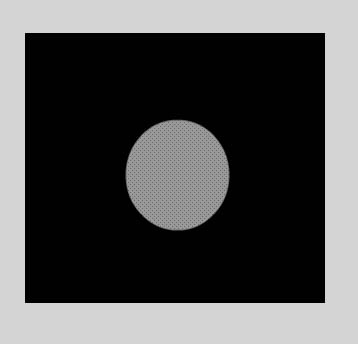
Step 3: To convert the oval into an MOVIE CLIP (Movie Clip Symbol) called “background”, by pressing F8.

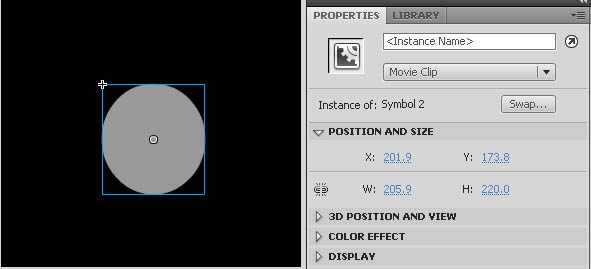
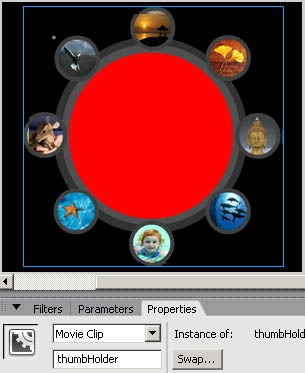
Step 4: Convert this Movie Clip into another one called “gallery” and then, from the properties panel, give it the instance name “gallery”. After that action script will be used to give the gallery some functionality and the instance names given to the MOVIE CLIP’s will be used to reference them.
Step 5: Double click on the “gallery” movie clip and then on the “background” movie clip. Name the layer with the dark oval “background 1”. Create the second layer called “background” and with the lighter grey (#505050) oval on this layer.
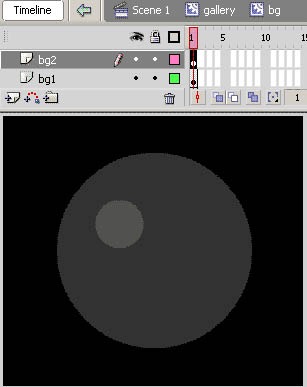
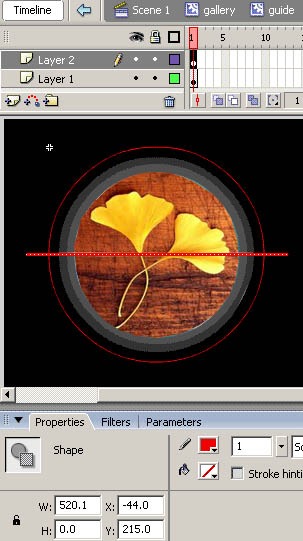
Step 6: From the properties panel, set the dimensions and positions, as shown below.
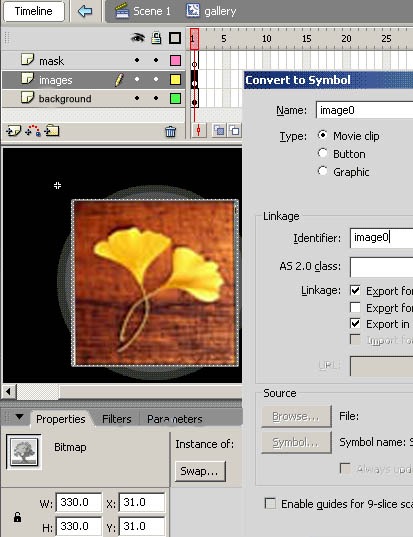
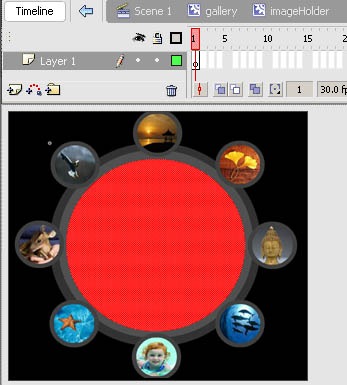
Step 7: Next, drag image 0 onto the “images” layer as shown below. Convert the image to a Movie Clip (F8) called “image0”, selection “export for action script”. This will allow the image to be attached with action script, using the “identifier” as a reference.
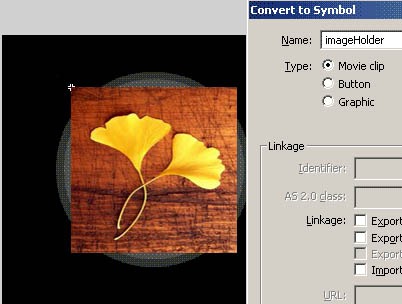
Step 8: Convert the Movie Clip again (F8) into another Movie Clip called “image Holder”.
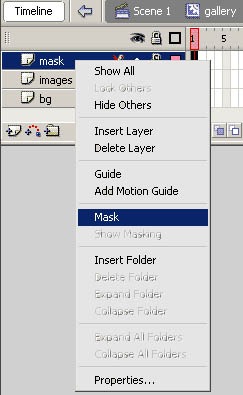
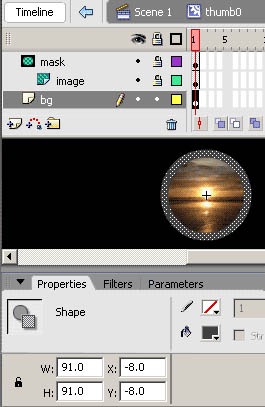
Step 9: Use the Oval Tool to create an oval on the mask layer, setting it to have the dimensions and positions as shown below. Right click on the mask layer and choose “mask”.
Fig (a):
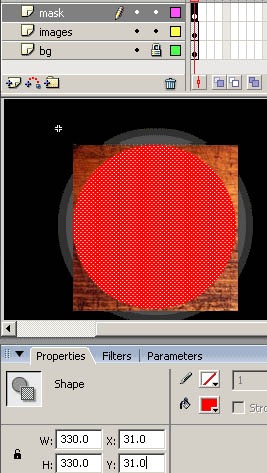
Fig (b):
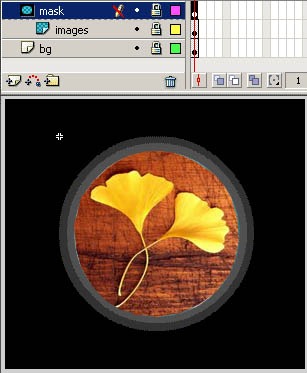
Step 10: The circle should now be masking the image, as shown below.
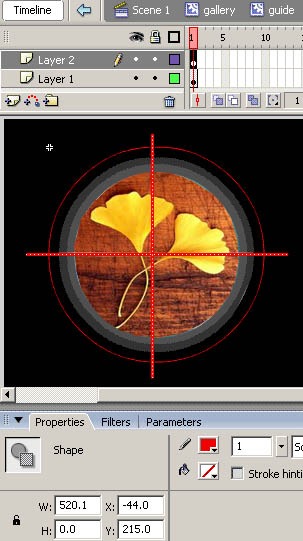
Step 11: Now we are going to create a temporary guide which will be used to place the thumbnails. Create a new layer called “guide” and see the Oval Tool to create a circle with just the stroke color and no fill. Set the dimensions and positions as figure shown below.
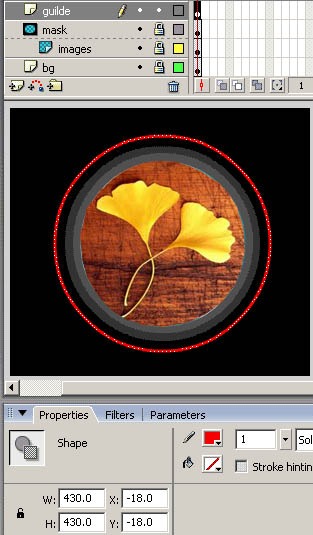
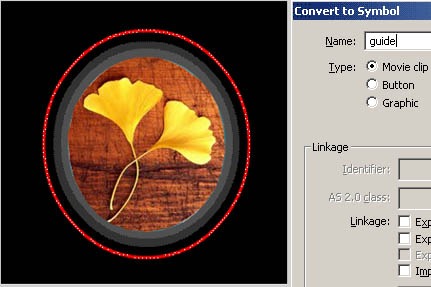
Step 12: Convert the ring into a Movie Clip (F8) called “guide”.
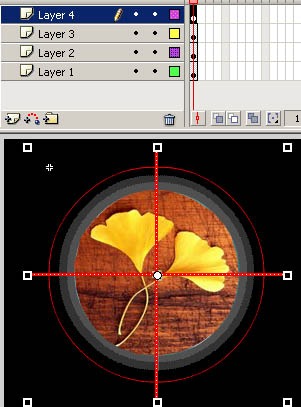
Step 13: Double click on the MOVIE CLIP, create a new layer and draw a line, using the dimensions and positions as figure shown below.
Step 14: Create a vertical line on another new layer as figure shown below.
Step 15: Now copy the 2 lines onto a single new layer.
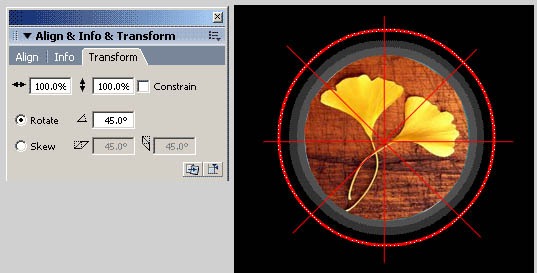
Step 16: Open the transform panel and set “rotate” to 45 degrees.
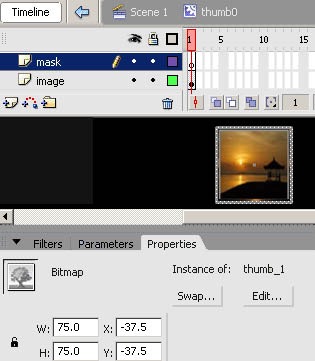
Step 17: Now, create a new MOVIE CLIP (Insert > New Symbol) called “thumb0” and create 2 layers called “image” and “mask”. Drag the thumbnail thumb_0 on to the “image” layer, placing it at the position shown below.
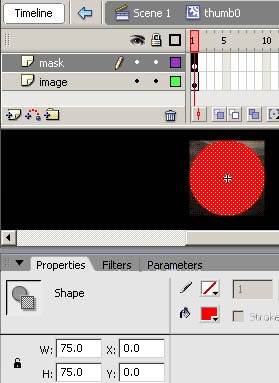
Step 18: Create a circle on the “mask layer”
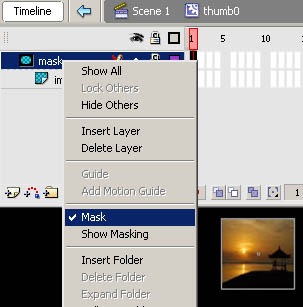
Step 19: Right click on the “mask” layer and chose “mask”.
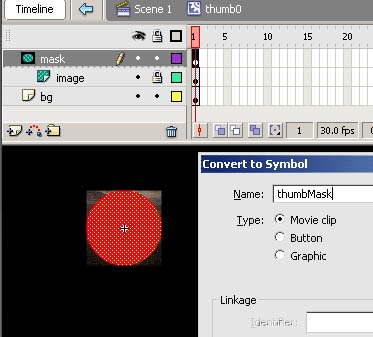
Step 20: Convert the mask into an MC (F8) called thumbMask. You can reuse this MC for the other thumbnails.
Step 21: Create a dark grey (#404040) circle on a layer below the image and mask, using the positions and dimensions shown below.
Step 22: This will also be reused for the other thumbnails, so convert it to an MC called “thumbBG”. So, that’s the 1st thumbnails created, now create the other 7, using steps 18 – 23.

Step 23: Next, create a layer called “thumbs” and drag thumb0 MC onto the stage, positioning it at the top over the guide. From the properties panel, give it the instance name “thumb0”.
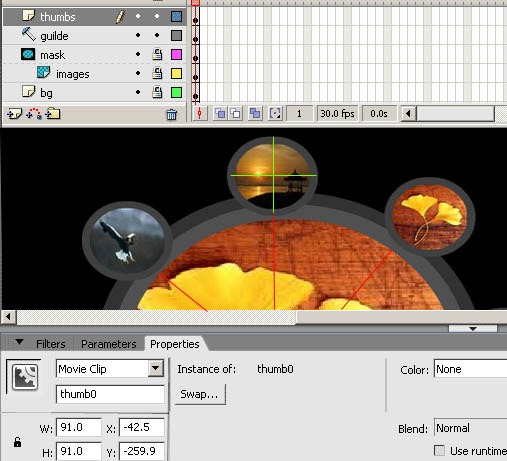
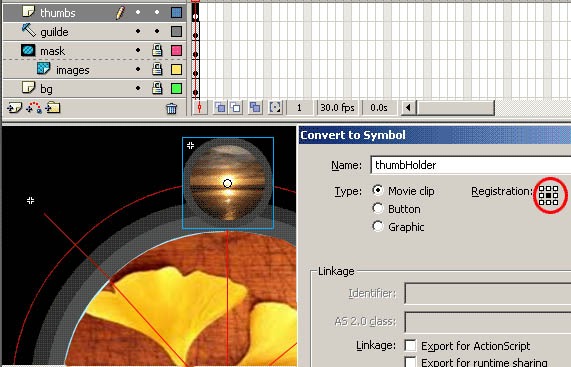
Step 24: Convert thumb0mc into another MC called thumb Holder. Set the registration point (circled in red) to the center. To rotate the thumbnails with action script, the thumb Holder MC will be rotate so that each thumbnail doesn’t have to be rotated individually. Setting the registration point to the center makes sure the MC will rotate from the center.
Step 25: Add all 8 of the thumbnails where the lines intersect with the ring. Place thumb1 at the second point, thumb2 at the 3rd, and so on.
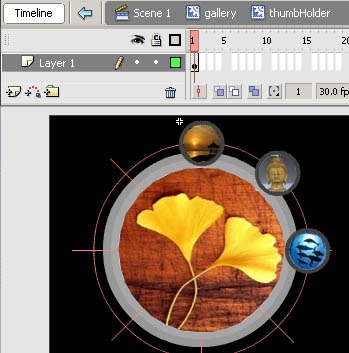
Step 26: When all the thumbnails have been added, go back to the Gallery Movie Clip and give the thumb Holder MC the instance name “thumb Holder”.
Step 27: Then the image Holder MC and delete the image MC inside of it. This is because we will be adding the image dynamically with action script.
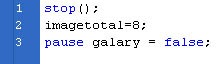
Step 28: Now we are going to create a gallery with rotating thumbnails. We will now use some action script. To make the thumbnails function and to rotate them around the main image.
Step 29: Code Explanation:
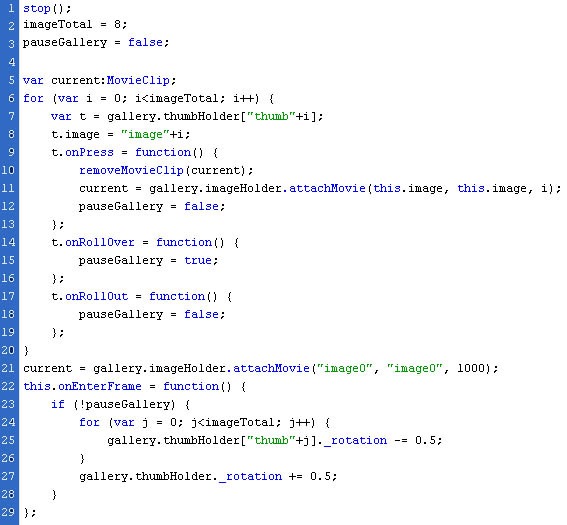
Line 1: A stop() function to stop it from looping
Line 2: A variable to hold the number of images in the gallery
Line 3: A boolean variable which is used to pause / unpause the gallery
Step 30: Code Explanation:
Line 6 – 7: A for loop is created to assign each thumbnail a property containing the name of it’s corresponding image. The “i” in the loop will start off at 0 and increment by 1 (i++), while i is below 8 (i Line 8: Now that we are storing “thumb4” in “t”, we give it the property “image” and assign it to hold image4 (“image”+i)

Step 31: Code Explanation:
Line 9: An onPress function is create for each thumbnail
Line 10: The last displayed image will be held in current, so we use this function to remove it before the new one is attached (line11), upon pressing the thumbnail
Line 11: We use the t.image property to attach the image to “imageHolder” MC. t.image is refered to as this.image because it’s being called from withing an onPress function.
Line 12: When a thumbnail is rolled over with the mouse, the gallery will be pause (see next step), but when the thumbnail is pressed, we want them to start rotating again, so we set “pauseGallery” to equal false.

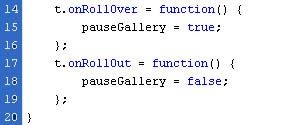
Step 32: Code Explanation:
Line 14 – 16: “pauseGallery” is set to equal true when the thumbnail is rolled over.
Line 17 – 20: “pauseGallery” is set to equal false when the thumbnail is rolled out.
Step 33: Code Explanation:
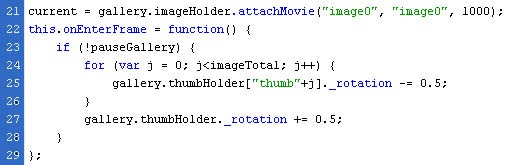
Line 21: When the gallery start image0 is attached to be displayed.
Line 22: An onEnterFrame function is created which will execute any code inbetween the braces {} repeatedly, at the frame rate (30) of the movie.
Line 23: Another loop is used to rotate each thumb counter clockwise with 0.5 degrees. This needs to be done because when the thumbnail holder is spinning round (line 27) the thumbnails will stop being upright.
Line 25: Last we rotate the thumbHolder by 0.5 degreess. You can change the value of this and line 27 to increase or decrease the speed of the rotation.
Step 34: the final code is
Leave a Reply